Bangladeshi Akhni with mutton meat, this Akni dish is a authentic rice dish with a combination of Meat Bhuna and Rice. This is perfect served with Bangladeshi style salad. I learnt this recipe from my mother. My mum used to always make this for us during special occasions and so I have many good memories attached to this recipe.
Clean the meat and cut in small pieces. Wash the meat properly and drain the water.
In a medium size pot, add 4 tablespoons of oil- adjust the oil if required. Add one large sliced onion and the meat.
Add all the whole spices and salt. As a guide add 1/2- under 3/4 tablespoon of salt. The rice will also have salt added to it.

Put the gas up and mix this in.

Bring this to boiling point. Once it does, put the gas down to medium heat and let this cook. The meat will cook in the excess water that comes out of the meat.

Cover and let this cook, stir at times. The excess water that comes out should be enough for the meat to cook in but if the water dries up too much then you can add a little amount of hot boiled water and mix it in to prevent the meat from burning.

Once all the water comes out, the meat will start to look like this.

Cook the meat for 40-50 minutes, adjust the heat if required during the cooking time and make sure to give it a stir at times.

After you cooked it for the recommended time, add in 2 teaspoons each of ginger and garlic paste.
I used homemade mixed ginger and garlic paste.

Mix this in.

Cook on high heat for 5 minutes.

Put the gas down and add all the spices:
Tumeric powder 1/3 Tsp
Coriander powder 1 & 1/2 Tsp
Cumin powder 1 & 1/2 Tsp
Hot/mild curry powder 1 & 1/3 Tsp (I like using the Bolst's brand)

Put the gas up and mix this in. Cook on high heat for 3-4 minutes.

After 3-4 minutes, put the gas down just under medium heat and cook the spices for 12-15 minutes. Make sure to stir often.

By the end of the cooking time, the meat should be dry like this.

Turn the gas off and keep aside.

This step should be done whilst the meat is cooking to save time.
I like using Tilda pure original basmati rice for my pilau dishes, but you can use any brand of your choice.
Wash 4 cups of rice in cold water a good few times until the water is clear. Once the water is clear, add some cold water and let the rice soak for 1/2 an hour only then drain the water fully.
Tip: If you do not have a measuring cup, use a standard tea mug to measure the rice as this is almost the same measurement to a cup. You can then use the same mug to measure the water at the end.

In a big non stick pot, add 3 1/2-4 Tbs of ghee-clarified butter, adjust if required.
If you cannot use ghee due to allergies, you can use good quality butter and add a little amount of oil to prevent the butter from burning. This tip was given to me by one of my Instagram followers.

Put the gas up and let the ghee melt.

Add in the whole spices, 1 & 1/2 Tsp of cumin seeds and ginger. I grated my ginger, you can also finely chop them.

Keep the gas on high heat and mix it in. Fry on high heat for 3-4 minutes by stirring often.

Add in the sliced onions.
Make sure you have thinly sliced onions for this stage.

Mix this in on high heat. Fry this mainly on high heat by stirring very often. Adjust heat at times if required.
Cook until the onions looks nice and golden.

Once the onions are golden, add in the salt to your taste.
I added 1 & 1/4 tbs of salt.

Mix this in and cook on medium heat for 2-3 minutes.

All ready for the rice.
![]()
Add in the rice.

Put the gas up and mix this in.

Fry this on high heat for 2 minutes then put the gas down a bit and fry for a further 4-5 minutes by gently stirring often. Adjust heat if required. It's important to fry the rice in the ghee before adding the meat so it tastes nice at the end.

The rice is ready.

Add the cooked meat.

Put the gas up and mix this in.

Put the gas down to medium heat and cook this for 4-5 minutes.
During this stage, boil a kettle of water.

Gently stir at times.

Add 7 cups of hot boiled water- if you used a mug to measure the rice then use the same mug to measure the water to get the perfect rice.
If you like the rice to be quite moist then add 8 cups of water. Sometimes depending on the rice you're using, the end result of the rice might be different.
![]()
Put the gas up.

Add in the chillies too
At this stage you can also add 2 cups of frozen peas/mixed vegetables- if you do then give this a good rinse before adding it in.

Mix this in

The water starts to bubble up. Cook this on high heat for 3-4 minutes or until the water starts to dry up.

The rice will start to look like this. Once it does, follow the next step.

Cover the pot at the top with foil. If you do not have foil, don't worry.

Place the lid on top, let this simmer and cook for 15-20 minutes or until the rice is fully cooked.
You can move the pot to slowest burner on your cooker if you want, simmer and cook this until the rice is fully tender.

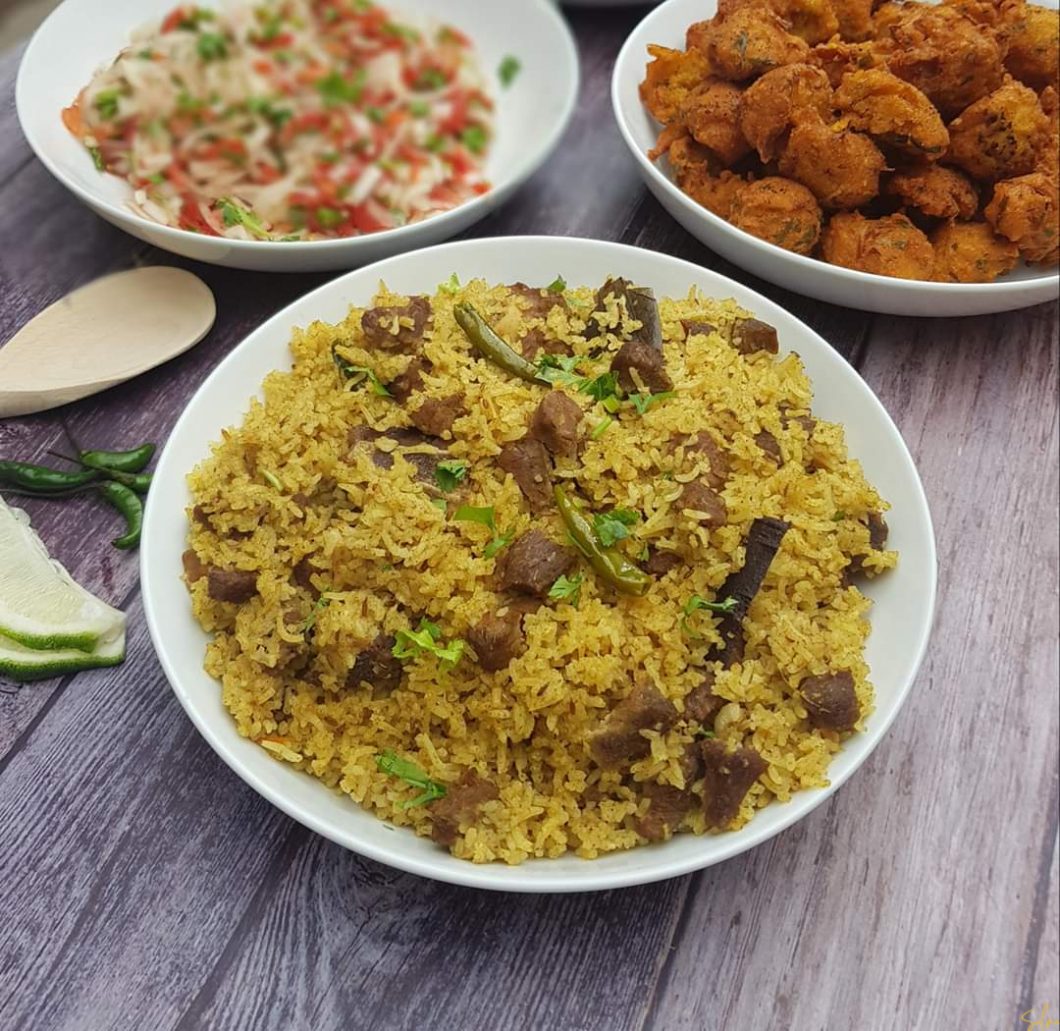
Here is the end result.
When you add 8 cups of water the rice will look moist like the picture. I've recommended 7 cups of water and so the rice will look a bit drier and nicer.
Let the rice rest for 10-15 minutes before serving.

Serve hot with salad and enjoy!

Thankyou for helping me cook recipes my mum used to make when we were kids, everything I made has come out exactly how I remember when I was a kid on Eid day, thanks so much
Thank you so much for your kinds words and you’re welcome. I am glad my recipes have helped you.